Promo Shoot with Olympic Hopefuls at 180 FPS with the Sony FS7
Olympic Hopefuls Shot at 180 FPS with the Sony FS7 from Erik Naso on Vimeo.
One of my favorite features of the FS7 is the ability to shoot at 180 frames per second with the full s35 read out and no burst mode. It’s rally damn good too! I had this shoot for Black History Month that had several Olympic hopefuls. They train in Chula Vista Ca. at the Olympic Training Center. In our preproduction meeting I said “this would be fun to shoot at 180 fps!” Sure!… That was easy 😀 Now to figure out how I want to do this. I haven’t had the Sony FS7 very long and didn’t do any real testing but I’ve seen some impressive samples and felt that pretty good about going for it. For this spot I shot the entire project in HD. The FS7 looks great in 1080p.

I knew I was going to be going back and forth from 180fps to 24p frequently. After using the FS700 and a 7Q+ I was worried I would have to make a lot of setting changes but I didn’t have to.
I setup the FS7 with S&Q in my “User Menu to be 180fps.Also a custom button for S&Q is already on the FS7 so switching it on and off couldn’t be easier. I also set the FS7 to shoot at 180 degrees. This helps since I know don’t have to worry about my shutter speed. For the best image you always want to shoot at 180 degrees especially at higher frame rates. Motion blur isn’t in slow mo.

The FS7 menu isn’t the easiest to use but the “User Menu” is FANTASTIC! I have my favorite settings all in the first few slots for very fast adjustment changes.
I decided to shoot in CINE EI mode Slog2.Sgamut. I choose not to use Slog3 due to how it clips earlier at 92 IRE. Slog 2 doesn’t clip until over 100 IRE. Much better for bight or sunny conditions. I’m not saying I do the “right” thing here but it works for me. This log stuff and separate family’s 😀 I also set my zebras at 62 and make sure I hit middle gray around 62 IRE.
Now with the camera pre setup to work fast all I needed to do was hit the S&Q button and start shooting. Love it!

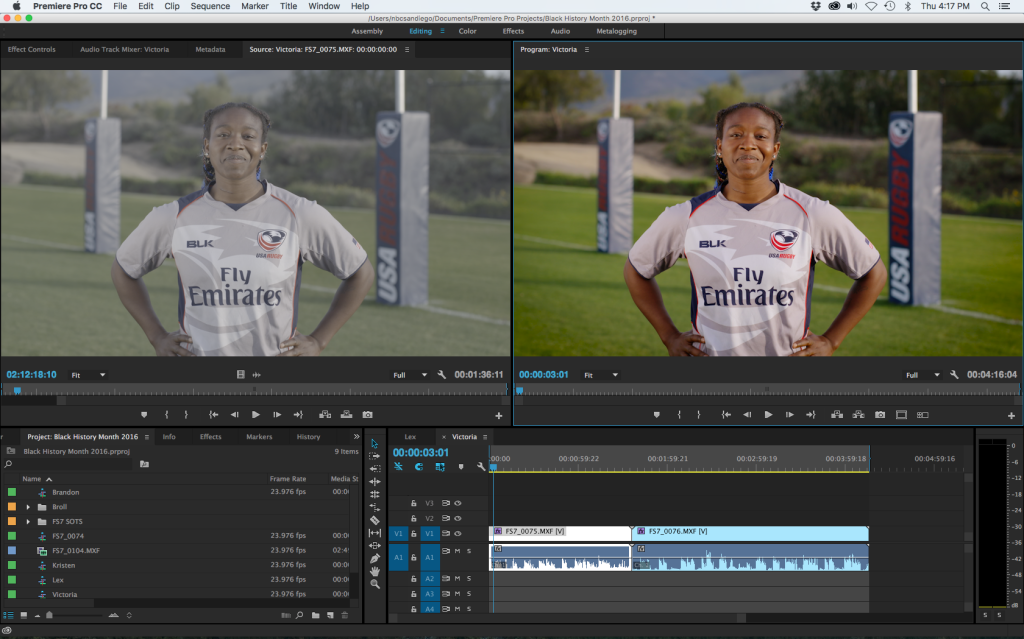
With the shooting all wrapped up it was time to edit and grade. I played with several LUTS but they all seemed a little off in Premiere Pro CC. I decided to experiment with making my own LUTS with LUTcalc. This is giving me some pretty good results for starting the grade. I need to tweak them a little more due to some weirdness with the red channel but I highly recommend creating a LUT if you struggle grading Log footage.
Overall I’m really enjoying the Sony FS7. I feel it a very easy camera to use with features I need. I cant tell you how happy I and to have internal 10 bit and grading it is just awesome!
Please signup for my newsletter! Follow me on Twitter @eriknaso and check out my page on Facebook.
Thanks for coming by! Please help support my site by using the links on this page or bookmark these from my favorite retailers, B&H, Adorama, Zacuto, Amazon.com & Think Tank Photo. Using the links cost you nothing extra, but it helps offset the cost of running my blog. Thanks again for coming by eriknaso.com!
Filed in: 4K • Featured Post • FS7 • FS7 • Sony • Video Editing


Thanks for sharing, Eric, and great footage!
I also use LutCalc for creating custom LUTs, my favorites are S-LOG2-Rec709 to Canon Wide DR-Rec709 (Data input, Legal output), and S-LOG2-Rec709 to Panalog-Rec709.
Not an FS7 by any means, but my camera is the Sony RX10 II, and after going through all the gamma/gamut combos, I’ve come to the conclusion that shooting in S-LOG2 with Rec709 gamut INSTEAD of S-Gamut produces spot on colors every time. S-Gamut is way off by default, and although you can color match it to a clip shot in Rec709 gamut, it’s so much easier to get the color right to start with. High dynamic range and perfect color is so easy thanks to this combo.
~Adam