I recently finished up shooting and editing two news image spots for the May sweep. I now use a Canon C300 for my broadcast work and I’m really liking the images coming out of the camera. Below is the first full C300 spot I have done. I shot this in Canon Log gamma and used the internal Canon XF codec. My main lenses where the Canon 24-105 f4L and the Canon 35mm f1.4L
Time. Morning News Image. Canon C300 from Erik Naso on Vimeo.
Here is the plan. I’m working on breaking down this and one more spot from shooting to editing them. The second spot was also shot in Canon log but I used the Canon C100 as well. I didn’t have the Canon C300 yet and rented the C100 for a week to try it out when it was first available to rent.
Shooting with log gamma is different since you want to expose the image a stop or two down in order to get the most from the dynamic range. Both cameras have an assist in making the image brighter and more natural in the viewfinder and LCD screen while shooting. Very helpful feature and works well.
For the TIME spot I used two Kino Flo Divas for lighting all the scenes and on camera lines. I love my Kino’s! Soft light and powerful. The Manfrotto FigRig was used for almost all the shots. The camera was moving all the time and I wanted that look. Kind of a documentary fast paced look.

My workflow in post goes like this. Edit the piece then start grading with Magic Bullet Colorista II. I’m really comfortable with Colorista II and like to use it for a couple of reasons. The main being I don’t have to conform and send out to another program to grade. It all happens inside my NLE. This is so much easier for me. I don’t need several nodes and Colorista has three rooms I can use. Master Secondary and Primary. I work backwards or from the bottom up.

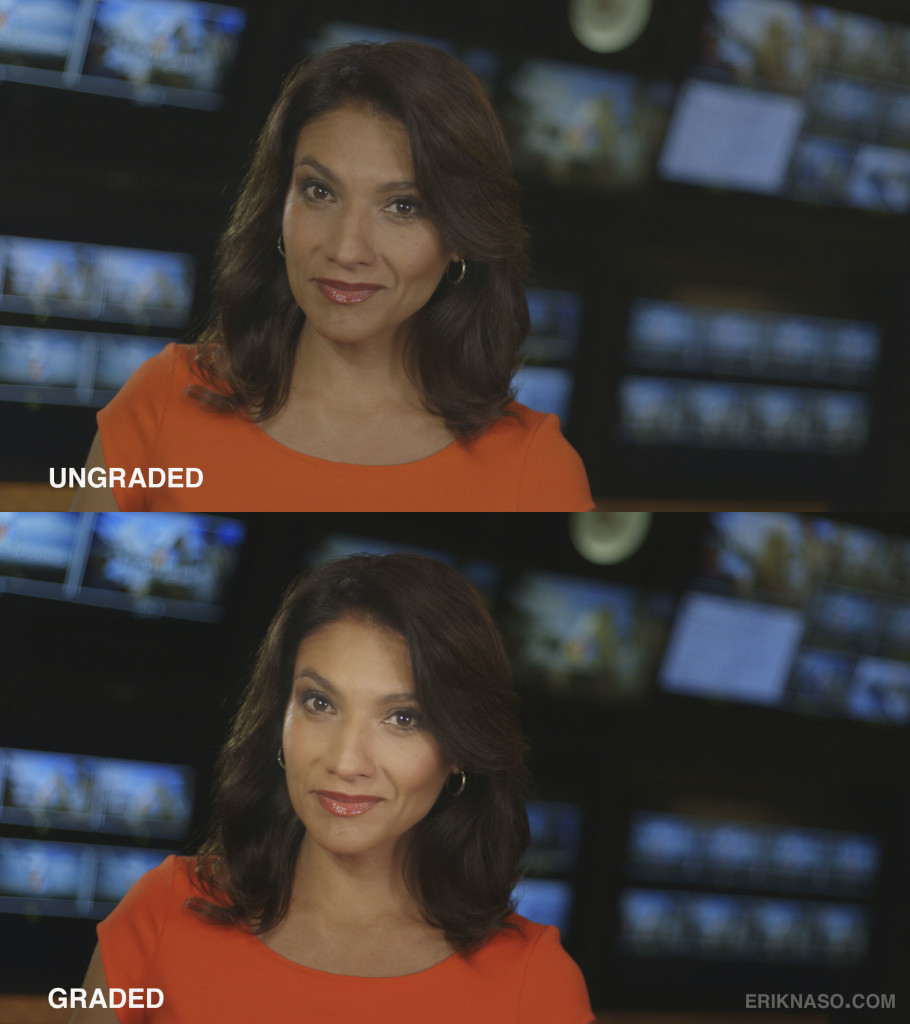
I start with Master and get the look I want. Add a curve and color balance the shot. These were pretty easy since the color balance was spot on and I didnt want to create a “look”. I then added more saturation then used the HSL to adjust skin tone and maybe enhance or decrease saturation of certain colors. See how I pulled the orange or skin tone HSL down to unsaturate a little.

In Secondary you have lots of great tools. The main one I like is the Secondary Power Mask and Keyer. A nice trick to soften the skin is to use negative values on POP. Instant skin smoothing.
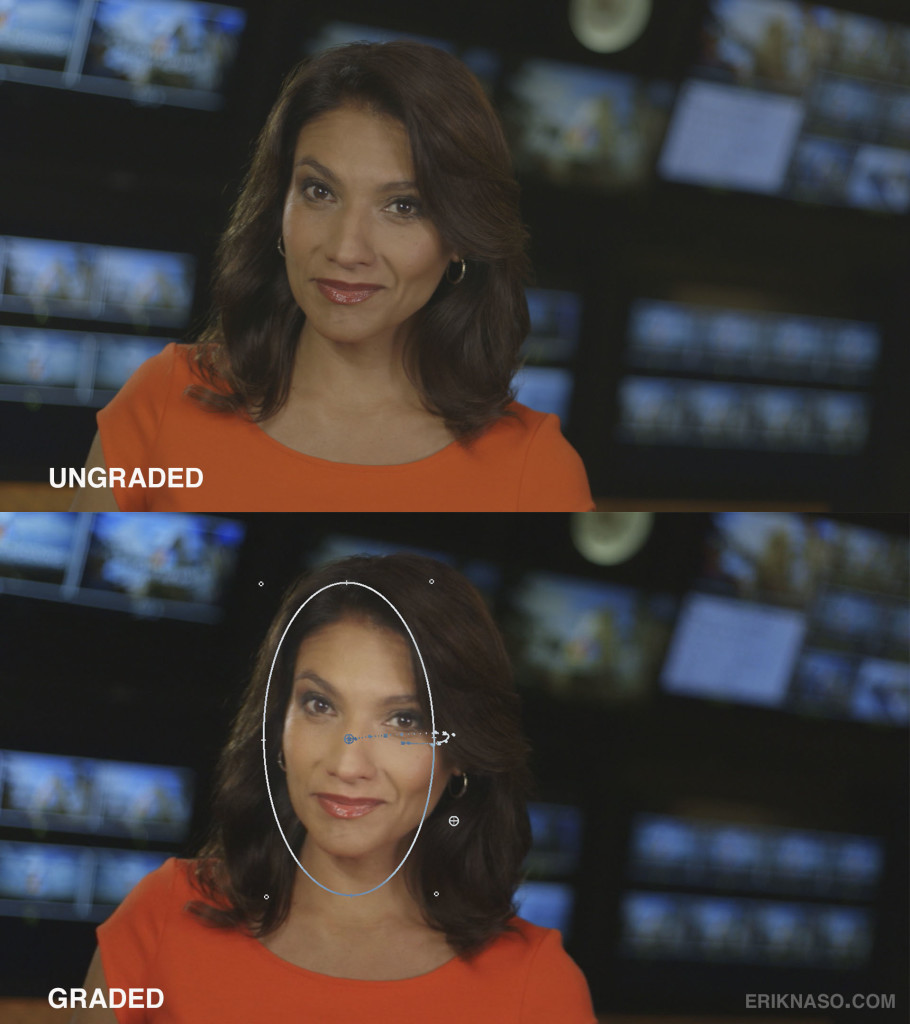
I use the secondary mask a lot. You can keyframe the mask as well if the shot is moving so the mask is in the right place. You can see the line and dots where the keyframes have been added on the sample above.
The secondary key is a very powerful tool but doesn’t work very well in Premiere Pro right now. I’m not sure why. Native codec editing seems to have the issue. If I transcode to ProRes then the key will work but so far not with native codecs.
In Secondary I created an ellipse mask that I put over the face to brighten it up a little. If I find a shot that really needs more work I will add another Colorista effect to the clip and create another Secondary mask where its needed
The spot below was shot with both the C300 and C100. This is a updated version. I shot the original a few months ago and reshot the main talent with the C300. All the Expert reporters were shot with the canon C100 with Canon Log gamma.I used a Kessler CineSlider for the dolly shots.
Experts. Canon C300 And C100 from Erik Naso on Vimeo.
Here are some frame grabs from the Experts spot.
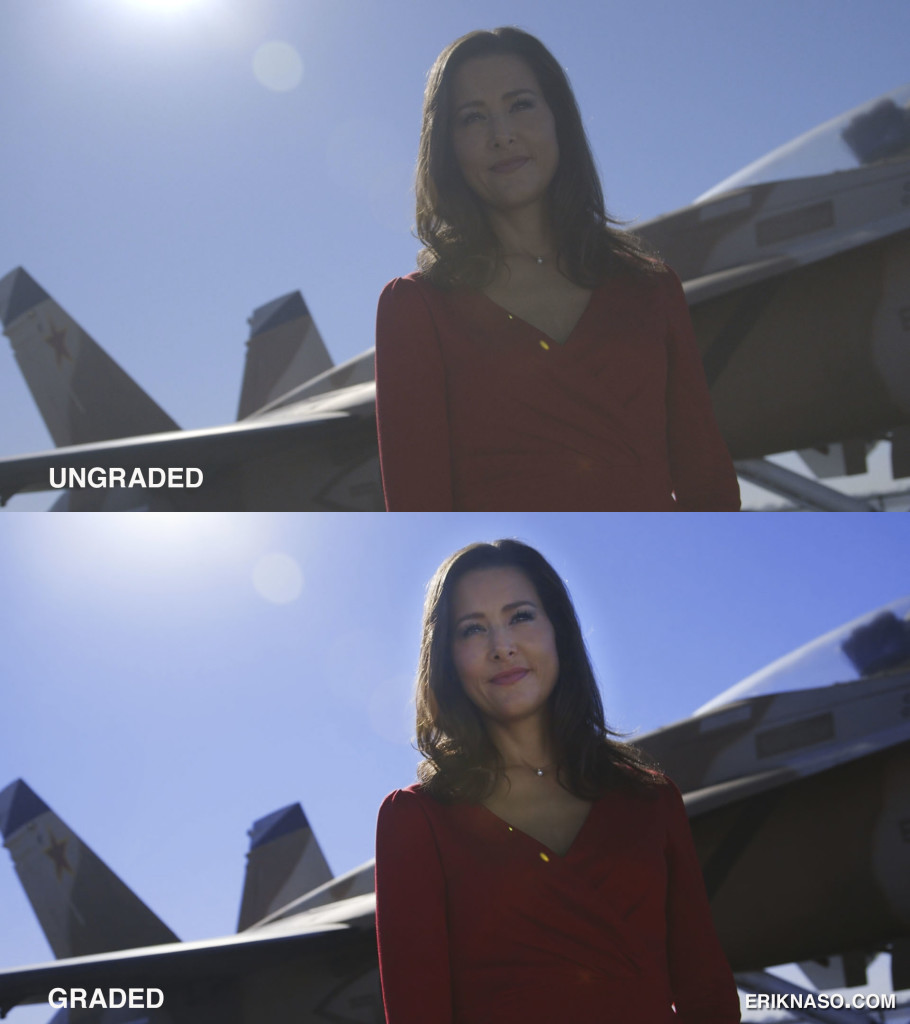
This is a good C100 sample. Since I had to expose the shot for the sun that is back lighting her. I want the sun in the shot and the reflector was doing the best it could. Here the AVCHD codec was giving me some issues. It’s not perfect but it works. As a still image you see more artifacts but when it’s playing it looks pretty darn good. I got a nice little flare going as well.
 Colorista II and a little Denoiser.
This is the final grade with two corrections. The first is an overall and second is a with a mask only on her face. Shooting Canon log is pretty easy and gives you the power to grade your image just how you want it to look and with Colorista II it makes it even easier.
Here is a great tutorial on Magic Bullet Colorista II with Director Stu Maschwitz. I must have watched this video 20 times. Its that good 🙂
I will add more samples to this post as I go through and get more screen grabs.
See ya soon!
Thanks for coming by! Please help support my site by using the links on this page or bookmark these from my favorite retailers, B&H, Adorama, Zacuto & Amazon.com . Using the links cost you nothing extra, but helps offset the cost of running my blog. Thanks again for coming by eriknaso.com!
[adsenseyu1]


Really nice image. I didn’t notice any rolling shutter issues on the pan move either was that added in post or done in camera? Thanks for the blog Erik. It’s a great resource.
Thanks JP. I’m glad you find the blog helpful.
All the moves are done in camera except for the slow pushes on the time lapse shots. Those are done in post. The C300 does pretty well in regards to rolling shutter.
I recently updated the article with more images and info.
Hi Erik, I think your two spots are great examples of how to get the most out of this camera. As a recent buyer of the C300 I’d be interested to know the general in-camera settings you use?
I find the cinema locked mode to be soft so I’ve switched to getting c log through the custom profile and turning the detail up. What detail settings do you use?
Have you had any problems with banding? I notice it in the highlights when I push the grade.
Do you use cinema gamma exclusively? I have found it ugly to grade when used in low contrast situations (example, dull overcast days).
I have been slightly underwhelmed with the test footage I have shot so far (albeit for one day) so any advice would be much appreciated!
Hi Niall.
I dont use any custom profiles or tweak the stock settings. I like Canon Log and wide DR. The image I get looks really good to me. If your having sharpness issues it could be from the lenses.
Hi Eric,
Recently we shot a TV pilot with C100 on C-Log and C300 on standard profile and the C100 just looked so much better and was so much more grade-able despite being only 24 Mb vs. the 50 Mb from the C300. C100 had better skin tones, and 300 was a lot grainier it was shocking that shooting log made so much difference!
Terry
Erik, I am a new user of C300 and our company wants to move ahead and shoot more in C Log. I have been out shooting all kinds of test footage for our editors to Grade and test abilities of Davinci Software. Based on numerous articles and chats i’ve read the C300 should be in ISO 850 and all other parameters should work around that ISO. Am I correct? What i’ve noticed is that most of the footage looks grainy in the darkest areas? I have seen other shot footage at ISO’s over 5000 and they look great. Am I the problem in obtaining footage or is it the post process is not there. I use an additional monitor with full screen waveform to keep my brights around 62% IRE and Skin tones around 32% again per articles, Canon and other chats. Any help would be greatly appreciated.
Erik,
I’m just starting to play with C Log. It certainly has a nicer look and feel to it. Could you pass on a few tips for me regarding shooting in C Log and also do you use LUTS? Or are you still happy with Colorista? Oh one more thing while i think of it… Any experience with C Log in low light? Many thanks.
I dont use LUTS. I just bought FilmConvert but haven’t really tried it yet. I use Colorisa II still.
I usually start with adding a curve the bring the blacks. Then the highlights. If the mids need a boost I will do them last. Adjust saturation then change color balance and continue tweaking from that point. A LUT would save time if you find one for the camera. FilmConvert has several. It’s a very cool color tool.
Dont underexpose in Clog. The image is hard to save because it’s only 8 bit and AVCHD. You are much better off using a higher ISO. Run a few test to find your comfort zone.
Thanks for this info. Yeah I’m experimenting. It really has a nice look when i get it right. Quite tricky to grade when I don’t. Its a work in progress.
I have issues with focus. That’s why I’m playing with it as i like the live view setting on the lcd screen.
I’m also experimenting with WDR and sharpness to see if i can find some kind of middle ground for myself.
I miss the old peaking settings on ENG cameras!
thanks again erik. Your blog is my favourite to follow.
Thanks Erik! I’ve been referencing this post for Months!!!